Save the environment with conda (and how to let others run your programs)
If you have been developing in Python, you may have tried to distribute your program to friends and colleagues. It can be mildly annoying when they try to run your program and it fails because they don't have obscurePackage42 installed. If you are nearby, then it is easy for you to call pip install a few times and get them started with your program. If you are trying to distribute a program to end users (or even some non-technical executives) then you really want something that is going to work "out of the box".
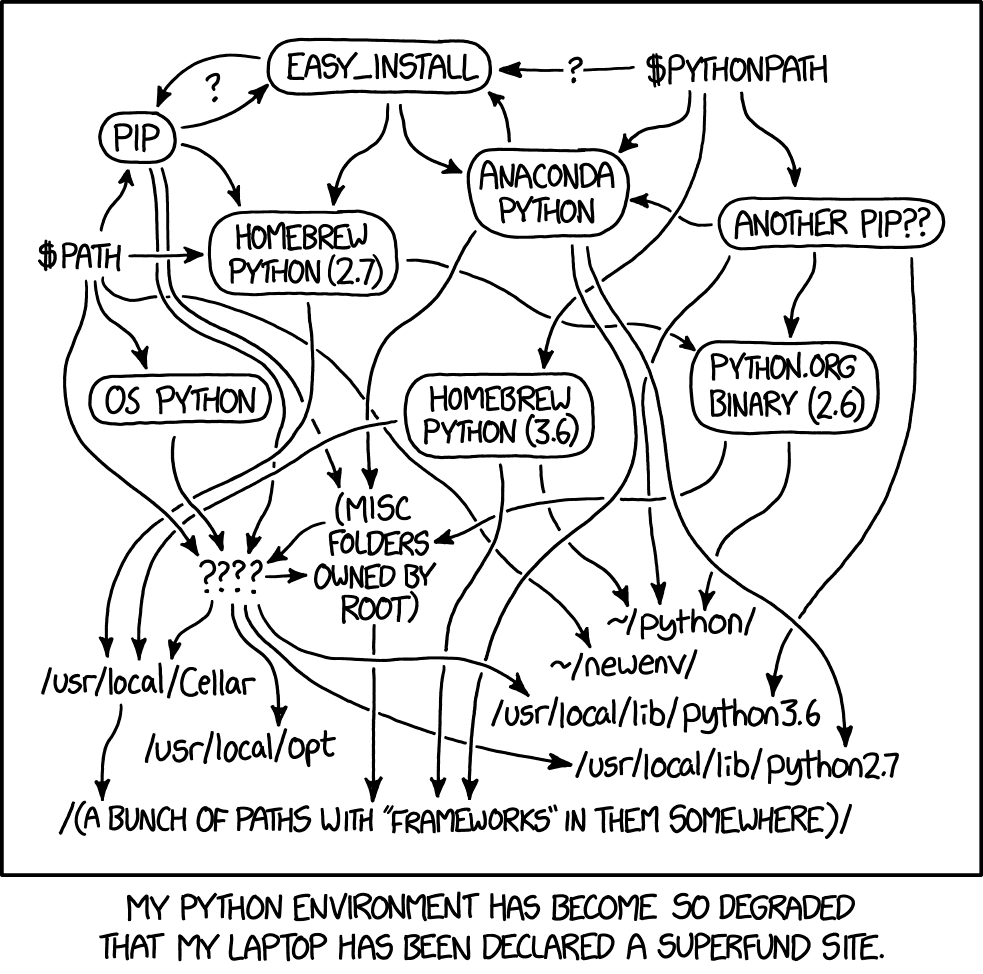
Using an environment has the additional benefit of having us deal with one specific known version of Python. The problem of "which Python am I using?" is one familiar to many of us.
The old way (and its drawbacks)
One way of doing this was to write a requirements.txt file. The format of this file was pretty simple:
# Installs
# A version of numpy no older than 1.14.0
# Exactly the version 0.23.4 of Pandas
numpy>=1.14.0
pandas==0.23.4
A single command, pip install -r requirements.txt and everything would be written to the main Python repository.
While simple to use, there are a couple of different problems with this approach:
- Version conflicts: What if one application required version
0.23.4of Pandas, but a different application required0.19.0(because it used a now deprecated feature)? We would have to reinstall fromrequirements.txtwhen switching between these applications. - Tracking dependencies: It can be difficult to keep track of which packages your application is actually using. You don't want to include all installed packages on your machine, as only a few are relevant to your application.
Environments were designed to address both of these issues.
Environments
An environment is a way of starting with a new Python installation, that doesn't look at your already installed packages. In this way, it simulates having a fresh install of Python. If two applications require different versions of Python, you can simply create different environments for them. If you start from a fresh environment and install as you go, you are able to generate a list of all packages installed in the environment so that others can easily duplicate it.
There are many different environments and dependency managers in the Python ecosystem. The most common ones in use are virtualenv and conda (but there are others such as poetry, pyenv/pipenv, hatch and many more I haven't heard of). This article is about using conda to manage environments, although all of these tools share the same broad goals. Some of the differences between these tools are touched on in the Alternatives section.
There are two steps to using an environment (with a third step needed if you want to use Jupyter notebooks)
- Creating the environment, either from scratch (a new project) or from a yaml file (duplicating an environment)
- Activating the environment for use.
- Register the environment with Jupyter.
To leave an environment, we have to deactivate it. The quickstart below will walk through the typical workflow.
Using an environment (quickstart)
Let's say you wanted to create an environment test_env to do some testing with Python 3.6, and install numpy and Pandas. At the terminal, type the following:
# create the (empty) environment
$ conda create --name test_env python=3.6

# activate the environment
$ source activate test_env

# Now in the new environment, install the packages.
# Note the prompt will (typically) tell you about the environment
(test_env) $ conda install numpy pandas
If you want Jupyter notebooks to see your new environment, you need a couple of extra instructions. Jupyter sees the different environments as different kernels. Once we create a new environment, we need to tell Jupyter that it is there:
# Note you'll want to do this in the new environment.
# First we will need the ipykernel package
(test_env) $ conda install ipykernel

# This tells jupyter to take the current environment (test_env)
# and make a "kernel" option named "test kernel" in the
# kernel menu
(test_env) $ python -m ipykernel install --user --name myenv --display-name "test kernel"
When loading a jupyter notebook, you can use the menu options Kernel->Change Kernel->test kernel to ensure you are using the test_env environment. (Update 2019-11-13: This process doesn't always work, this article gives you ways of checking and fixing it if it doesn't.)
Now you want to make an environment.yaml file that will allow others to recreate the environment from scratch. To make this file, we use the export command and send the output to environment.yaml:
# while in test_env, export the packages used to an environment file
(test_env) $ conda env export > environment.yaml
Once we are done with the environment, we can deactivate and delete the environment:
# Leave the environment
(test_env) $ source deactivate

# Now we are no longer in test_env, we can delete it
$ conda env remove --name test_env
Making the environment again from the yaml file
If you have the yaml file (created from conda env export), then recreating the environment is a single command:
$ conda env create --file environment.yaml
Note that you don't need to supply the name of the new environment, as the yaml file also contains the name of the environment it saved. Make sure you don't give your environment an embarassing name, as everyone who recreates from the yaml file will see the name you used!
Finding conda environments on your system
Of course, you may choose to deactivate your environment but keep it around for later. If you want to see the environments installed on your system, use
$ conda env list
Useful commands
Here is a brief summary of useful commands for environemnts. Anaconda has also published a cheat sheet with a more extensive list of useful commands.
| Command | |
|---|---|
Create a new environment ENV_NAME with Python version 3.X |
conda create --name ENV_NAME python=3.X |
Create a new environment ENV_NAME with some initial packages |
conda create --name ENV_NAME python=3.X pandas ipykernel |
| Create a new environment from a yaml file | conda env create --file environment.yaml |
Activate the environment ENV_NAME (OSX, Linux) |
source activate ENV_NAME |
Activate the environment ENV_NAME (Windows) |
activate ENV_NAME |
| Deactivate the current environment (*) | source deactivate |
Delete the environment ENV_NAME |
conda env remove --name ENV_NAME |
| List all installed environments | conda env list |
| Create a YAML file for active environment(*) | conda env export > environment.yaml |
The commands with (*) require you to have the environment active before using them. The naming is a little odd for creating environments: if creating them yourself the command is conda create ....., but if creating them from a yaml file we use conda env create ....... This is not a typo!
Tip for maximizing portability
Some packages are system dependent (e.g. the Python Image Library Pillow is used by OSX and Linux, but not Windows). Once you create your environment.yaml file, it is often a good idea to eliminate packages you don't use directly. For example, if you tell conda to install pandas but not numpy it will figure out it needs numpy for pandas to work. You should aim to eliminate all the packages in environment.yaml except the ones you actually import, so that conda can figure out which other packages are needed for the user's system (which may be running a different operating system to yours).
Summary
Creating environments allow us to make sure users we distribute our code to have the right packages (and the right versions of those packages installed) to run our code, without interfering with other programs. We activate and environment to start using it, and deactivate to leave again.
If making a new environment that you want others to use, the workflow is
$ conda create --name ENV_NAME python=3.X <packages to install>
$ source activate ENV_NAME
(ENV_NAME)$ ...... do stuff (e.g. write code, conda install more packages)
(ENV_NAME)$ conda env export > environment.yaml
(ENV_NAME)$ source deactivate
# back to regular shell
$
If you are using an environment someone else has created:
$ conda env create --file environment.yaml
$ source activate ENV_NAME
(ENV_NAME)$ ..... do stuff (e.g. run program that uses this environment)
$ source deactivate
Alternatives
- The original virtualenv. As the Jake VanderPlas article "Conda: Myths and Misconceptions" points out, these are mostly interchangle if you are only installing python packages into your environment. In slightly more detail
virtualenv/pipinstalls python packages into any environment, whilecondainstalls any packages into conda environments.
If you are solely installing Python packages, there is not much difference between the two.
pyenv/pipenvby Kenneth Reitz. The main goal of this project was to automate/simplify environment creation, but is not as mature as eithervirtualenvorcondasolutions.poetryby Sébastien Eustace, which aims to be a packaging and deployment tool.
With the exception of virtualenv, none of these solutions are as mature as conda. This is a piece of the Python that will hopefully improve and simplify, but for now, Randall Munroe's XKCD comic puts it well.